DIY Window seat:
the best seat in the house!
This family window seat is a great project if you are keen on Home Improvements and love DIY. Read on for first hand 'how to tips and tricks.'
As you would expect the team who bring you the Home Improvement Expo & Auckland Home Show are a creative bunch. We all love improving our homes. Marketing Content Manager Eve and her partner Dale completed their latest project - a DIY window seat for their dining area recently; read further as she explains the process of creating what is now the ‘Best seat in the house’.

Why build a window seat?
My favourite area in our home has always been the window seat in our Master bedroom. I do love to perch there on a Sunday morning and watch the world go by. Curling up with a cup of coffee, a good book, daydreaming (I'll admit it, catching up on social media) and relaxing amongst the plush cushions in the morning sunshine is one of life’s little pleasures!
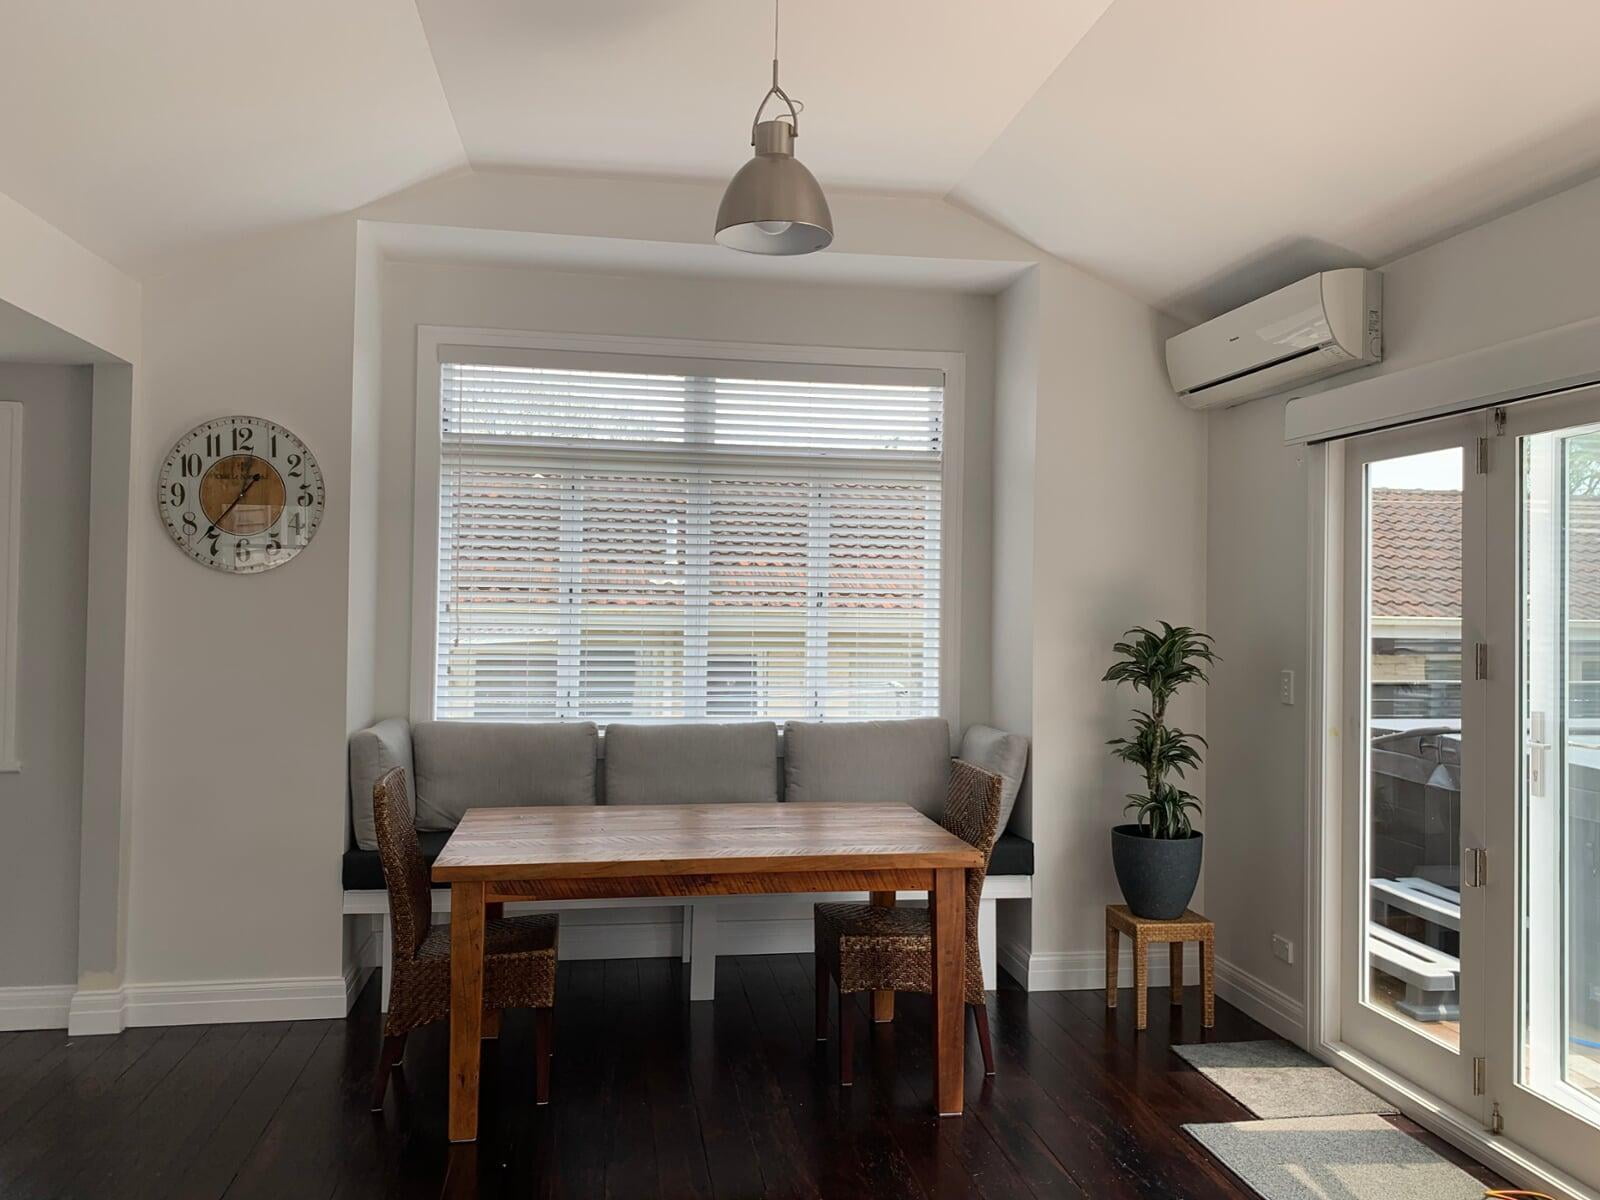
So when we were finalising our dinning / living room renovations we discussed how best to make the most of the dinning area bay window… why not another built in window seat? An awesome solution because we knew it would make the most of the space.
- We wouldn’t be losing much floor space.
- We’d gain comfortable seating around the dinner table.
- A lovely sunny place to curl up and relax in the afternoon sun.
- Extra storage places if we wanted.
- And a terrific place to work.
Although you can build a bench seat pretty much anywhere in your home, a sunny window in the living space is a beautiful spot. We’ve always kept our design style clean, simple and fresh so this was a way to add character and function without being fussy or cluttered. Plus with 2 kids it’s nice to have designated space to chill out without going off to different rooms.
How do you build a window seat? Research. Inspiration. But mostly Pinterest!
Ahhhh good old Pinterest, the place to daydream about decor and see what others have done before you… some with varying degrees of success. If you’re ever feeling bad about DIY projects gone wrong, you have to check out our Home Show collection of Pinterest fails here. Guaranteed to give you a laugh and feel better about your own attempts.
But in all seriousness... it is the best place for window seat inspiration, you can check out my collection of window seat inspiration on the Auckland Home Show Pinterest page. There are so many ideas, that you’re sure to find something that will work for you.
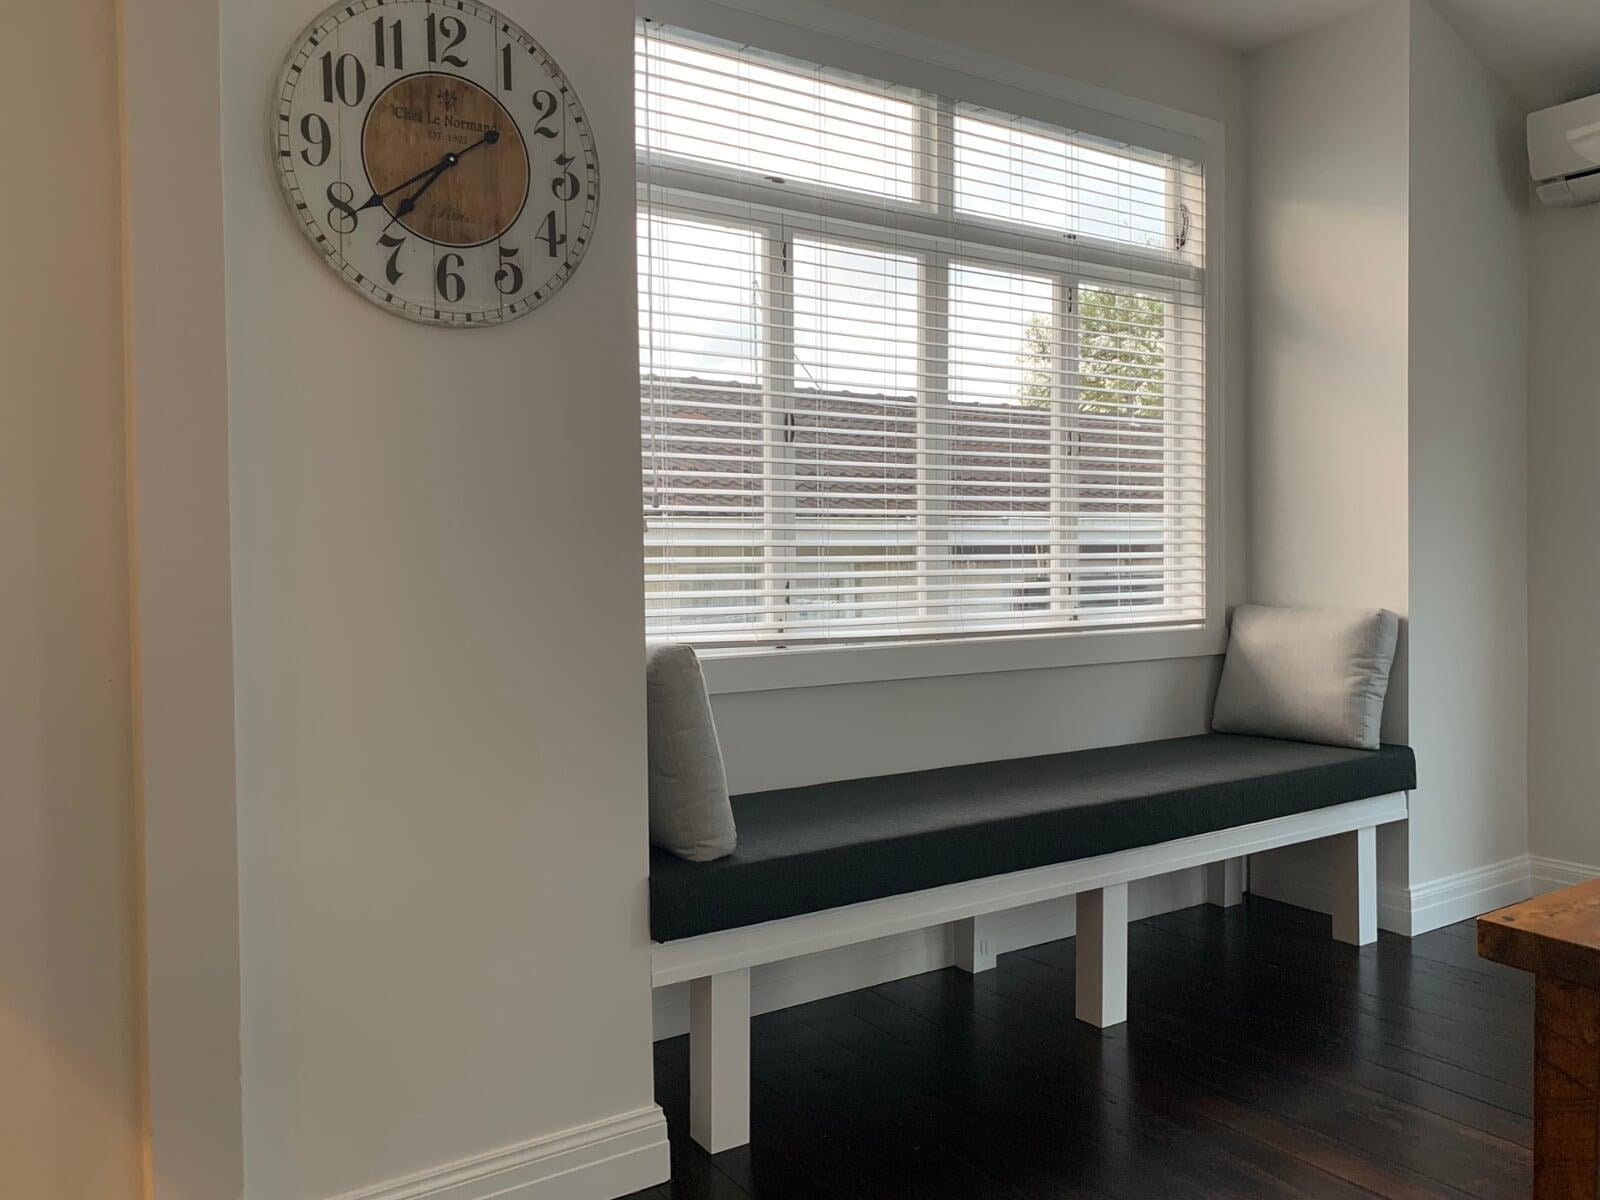
Our Master bedroom has the classic window bench seat with a hinged opening in the top, underneath the mattress. While it's great for storage it is a bit difficult to build. More importantly though, we thought it’d be a bit bulky in the dining room if we enclosed the whole seat. We wanted to still be able to see the floor underneath, to keep the space looking open so we deemed the hinge style unnecessary.
Our DIY dining room window seat plan.
It was a bit harder to find examples of window seats used in dining areas that would suit our needs and current chunky table. After scrolling through 100s of ideas on Pinterest, we found a combination of ideas to tweak that would be ideal. We went for a simple classic design. Yes, there's a theme here throughout our home - 'simple'. We wanted it to be no fuss, comfortable, and retain the practicality of working with our dining table. Dale set out a 'guideline' for how we’d approach this (sketch with stick figures) and went to work.
Our bay window space is 2.6 mts wall to wall, a very generous area to work with. This allows 3-4 people ample space sit very comfortably. And more than enough room for an adult to fully stretch out and use it as a glorious daybed.
Luckily since our renovations when we added the reclaimed window, we had the idea of building in the window seat in the back of our minds. We did not add skirting back into the room in that area. So, keep in mind that if you are retro-fitting a window seat it’s a good idea to remove the skirting board, so the bench legs sit flush against the wall. We also removed our carpet and restored the original wooden floors which was ideal for installation. Having to build onto, or remove carpet would make it a bit more difficult.
Here's how we made our window seat
This design is pretty basic and a combination of ideas we’d seen. As always we began with measuring the length, depth and height of the space, then mapped it out on the rudimentary line drawing so we knew what we were working with and could purchase supplies.
A good height to set your bench at is 350mm. This way 100mm foam padding will have you sitting 450mm off the floor, which is a nice height for kids and adults alike. We went a bit higher to include the extra framing and baseboard height which gave a little higher result. But that works for us since our table is taller than standard.
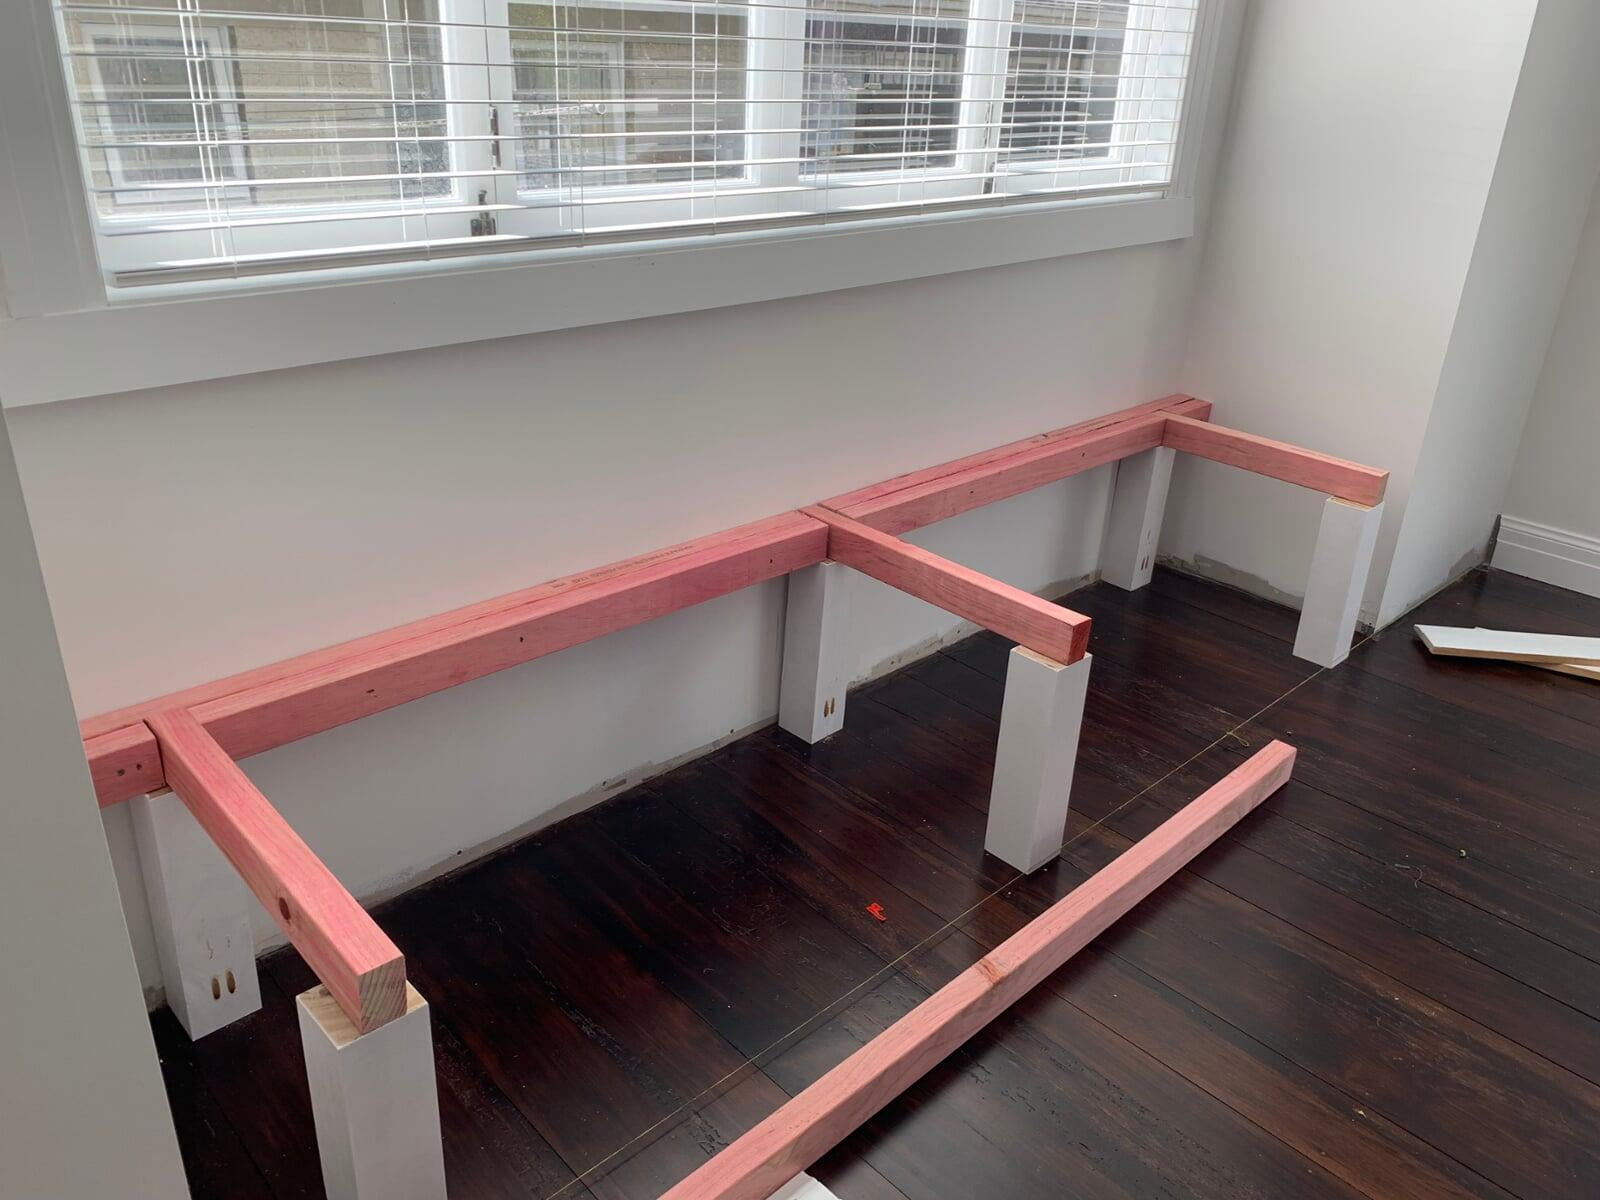
1. We created 6 legs for the seat all 350mm high, sanded and painted with base coat. Using a clever little pocket hole jig system we screwed the legs into the floorboards. You could also use brackets to secure the legs if you don’t have the pocket hole tool. While it is built-in we did not attach to the wall at any point and the load is completely carried by the legs. We also chose to move the legs in from the wall to allow enough space each end to incorporate a device charging / storage space.
2. We measured the length, and width, that we wanted our bench seat to be. The old adage of measure twice and cut once is never more true here!!! We created a rectangle frame to fit using 75x50mm framing timber - and doubled up both lengths against the wall and in front for extra stability.
Tip: You might have an option to nail or screw directly into the corner studs and that will work well too. We decided on a free standing frame that slots in. Doing that means less damage should we ever want to remove it.
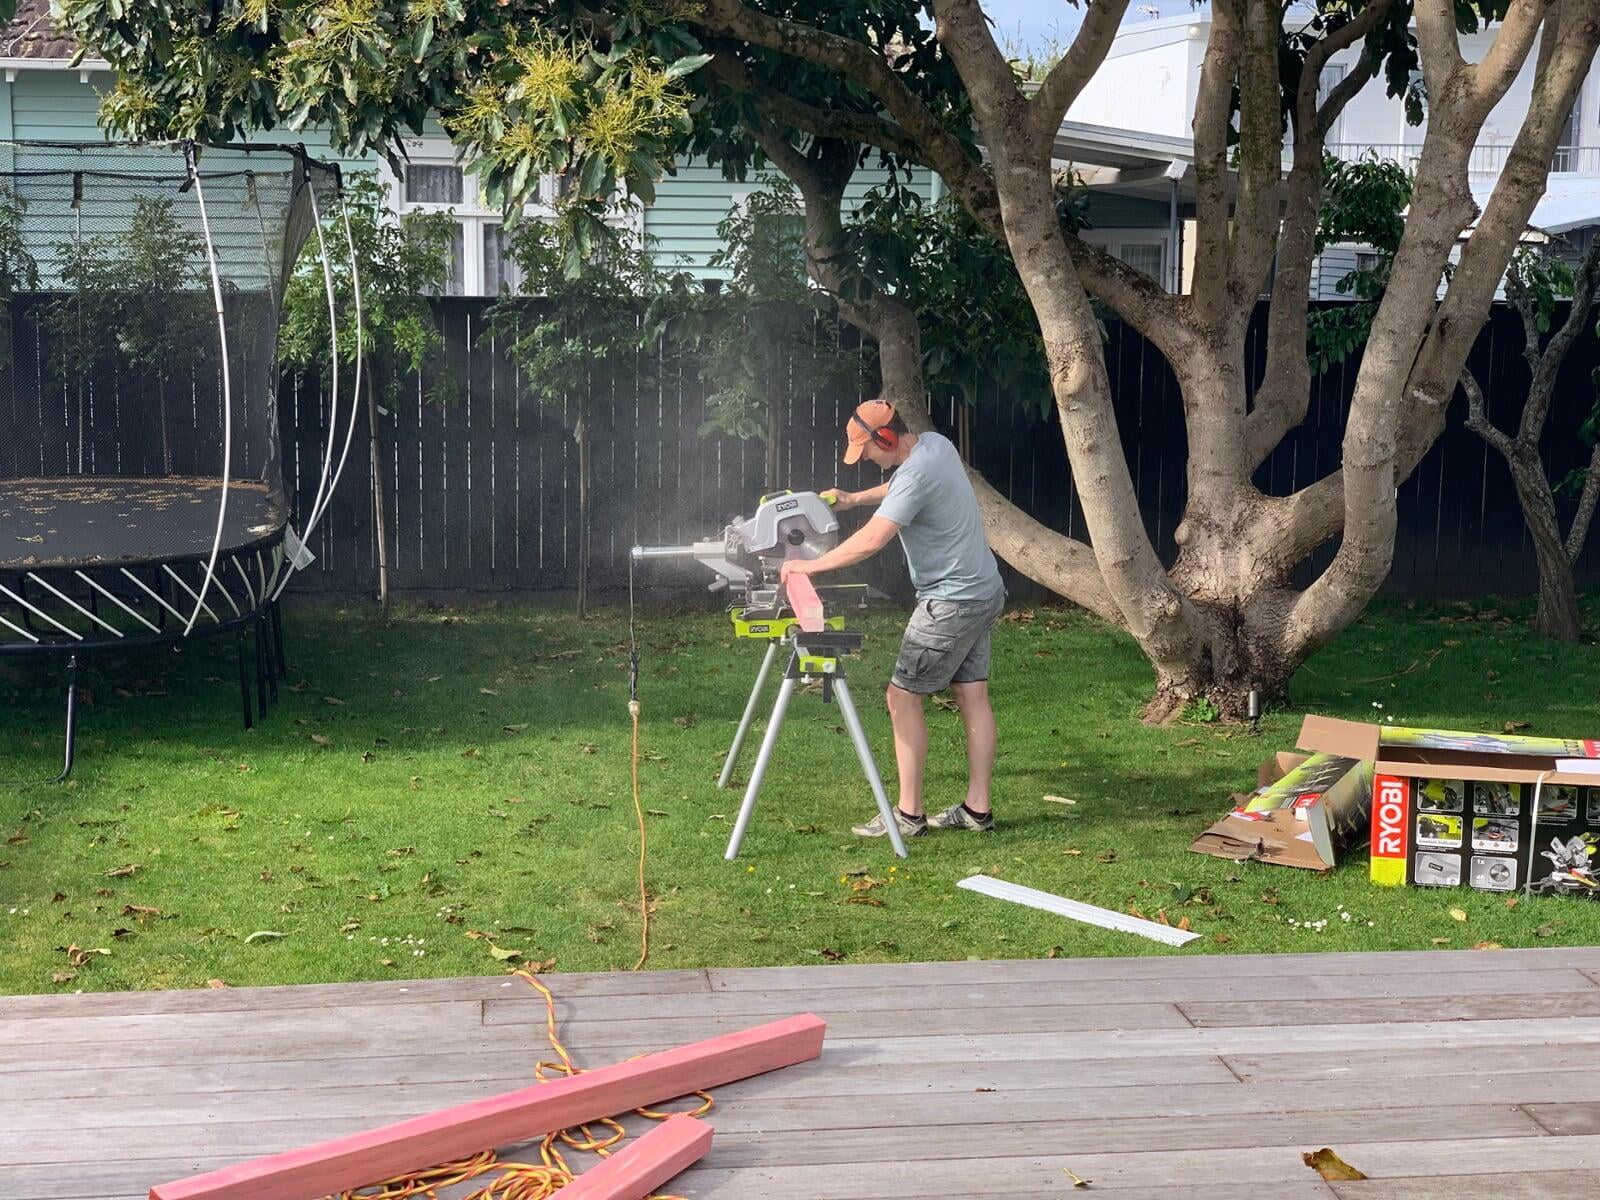
It’s at this point our old faithful Drop saw gave up ghost which meant another trip to Bunnings for a shiny new addition to the tool shed (hence the packaging in this shot). Guess we’ve got a lot more Home Improvement projects coming up to make use of this investment!!!
Moving on...
3. To strengthen the frame we used offcuts across the width of the frame - attached by nailing straight through the top of the legs.
4. The rectangle frame was completed with more framing timber - once again we doubled up for extra stability on the edge.
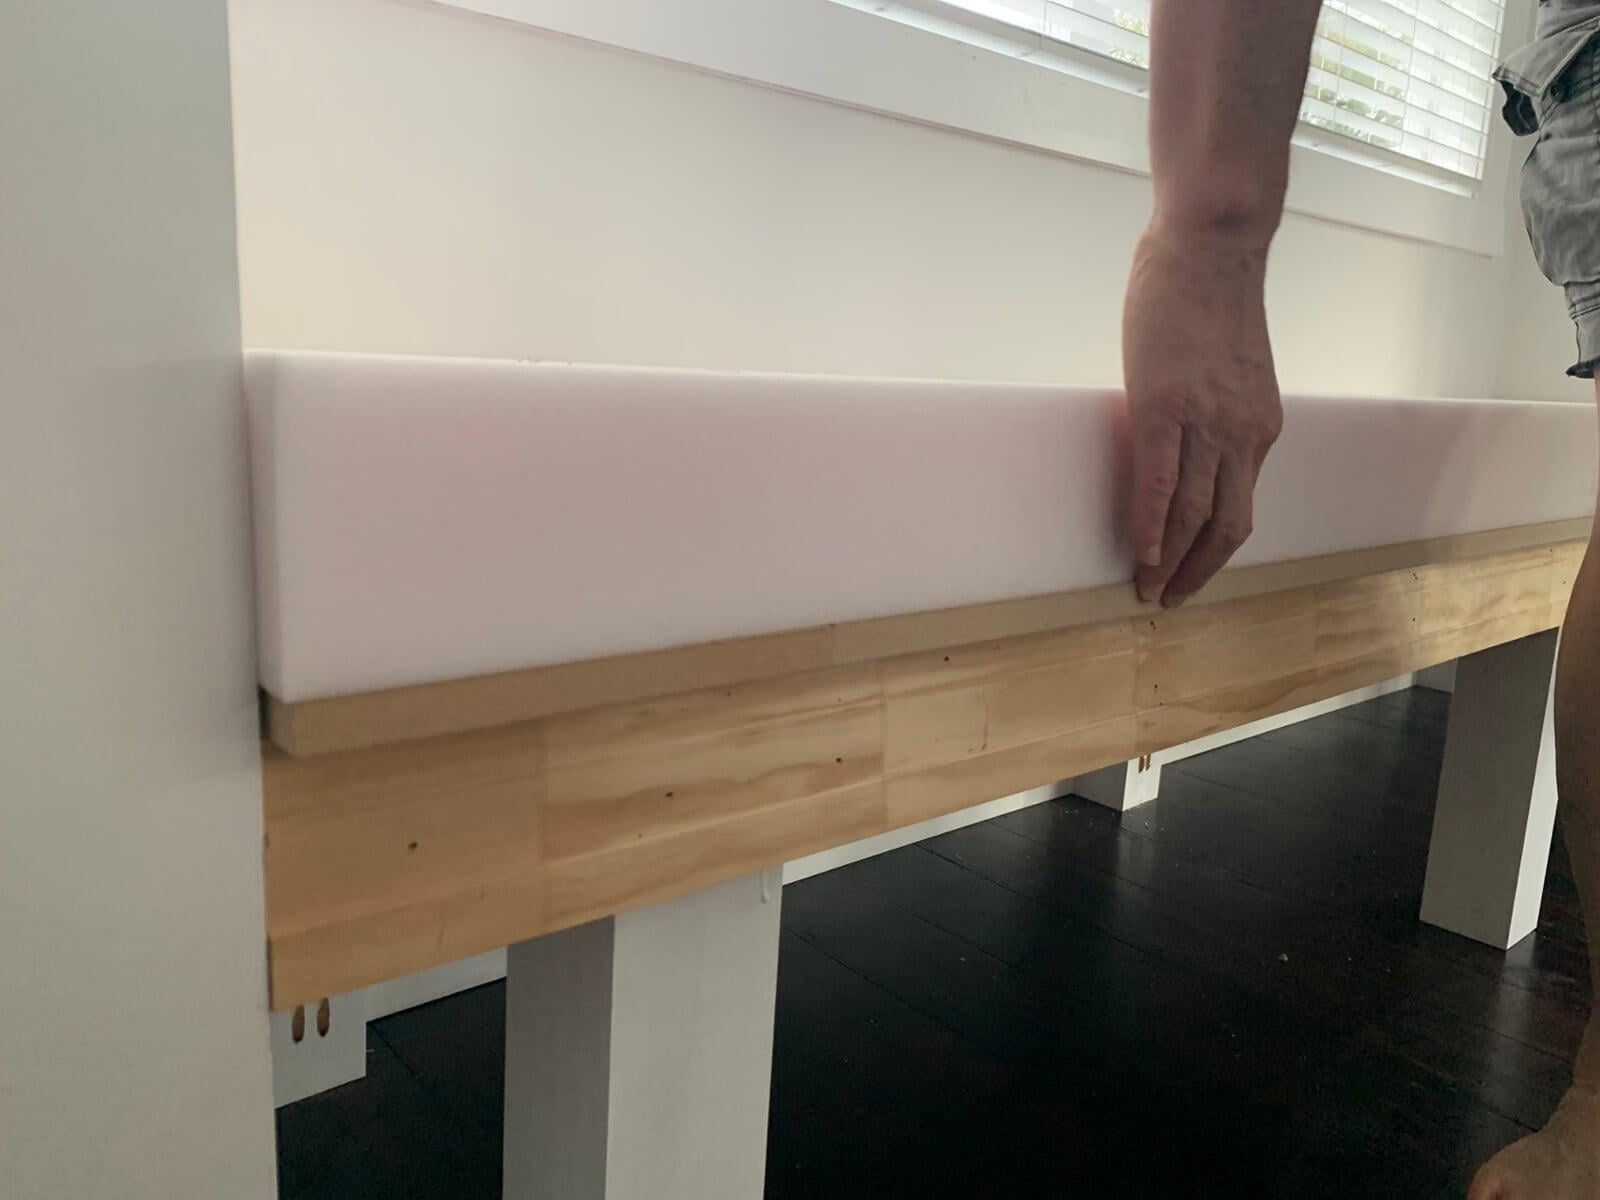
5. Finish your bench base construction with dressed timber wide enough to cover the framing. We actually used our architrave to tie in with the rest of the room. Cut 1 length for the face, fix with wood glue and small screws. You could also use smaller pieces to cover the legs.
6. Use wood filler over the screw holes, fill all the gaps. Sand the filler and lightly sand and round all sharp corners. Undercoat the whole bench, and any timber that can be seen with 1 coat of primer. We used Resene Quick Dry Primer Undercoat, then finished with 2 coats of paint to match our existing white architraves.
7. For the base of the seat we used a length of 18mm plywood (MDF would be good as well) to fit the length and width of the bench seat. We had to connect 3 pieces because of the size and used the pocket hole jig system again with screws and wood glue.
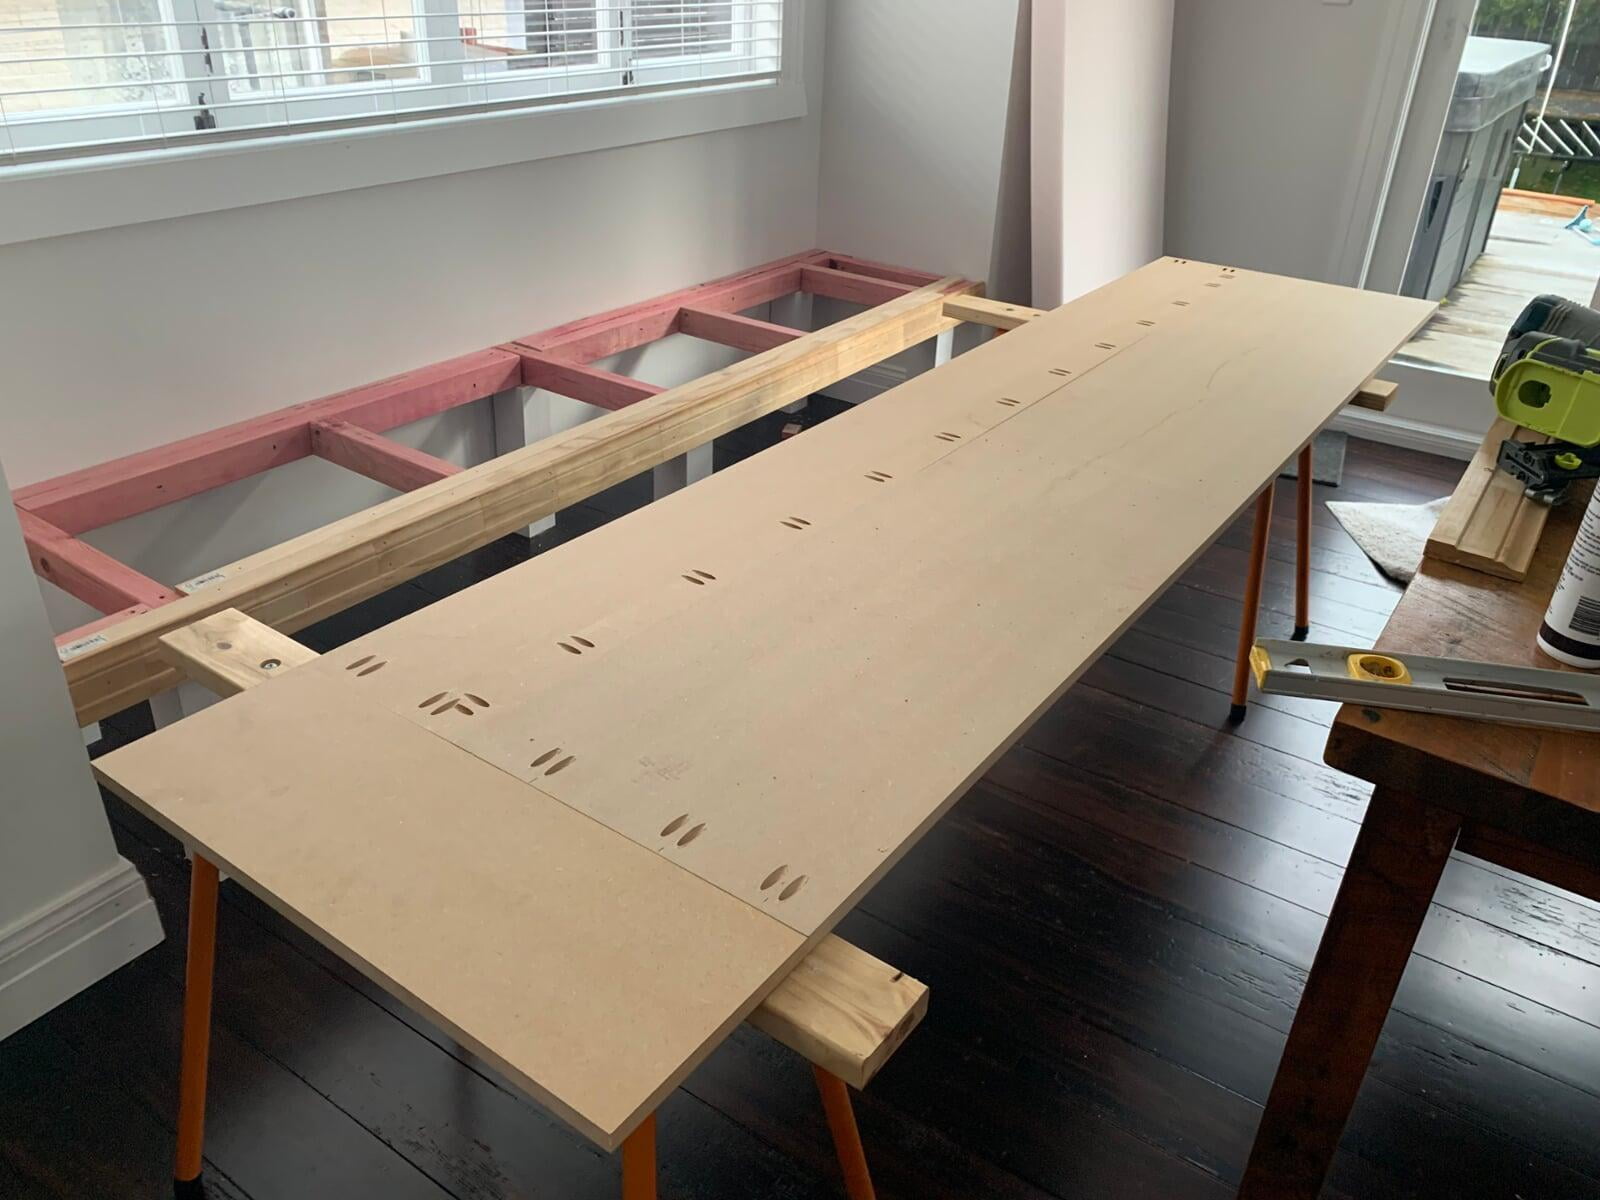
Tip: take your measurements down to your local timber supply store and get them to cut the plywood to fit. Both Bunnings and Mitre 10 offer this service in New Zealand and probably many others.
8. Who knew there were so many options when it comes to foam? Not me, that's for sure! In the end we went for a very firm foam top for longevity since it’d be getting daily use. We sourced ours from the super helpful PARARUBBER team. They cut and glued some high density foam perfectly to size and for us.

9. Continuing on with the DIY we chose to upholsterer the foam mattress ourselves. It was a relatively simple process; staple gunning the upholstery fabric to the plywood board. There are a lot of tutorials online... but here's what we did.
Step-by-step 'upholstery for beginners' (by beginners)
1.We glued the pre-cut foam to the ply board, letting it dry overnight.
2. Next up was a quick trip to Spotlight. We choose heavy-duty upholstery fabric and added a batting layer for in between the fabric and foam. 3mt was the perfect amount for us to work with. We allowed for 200mm excess on all edges to wrap over the foam and board. Actually there was enough fabric left over because of the fabric width - it might get used to create cushions with in the future.
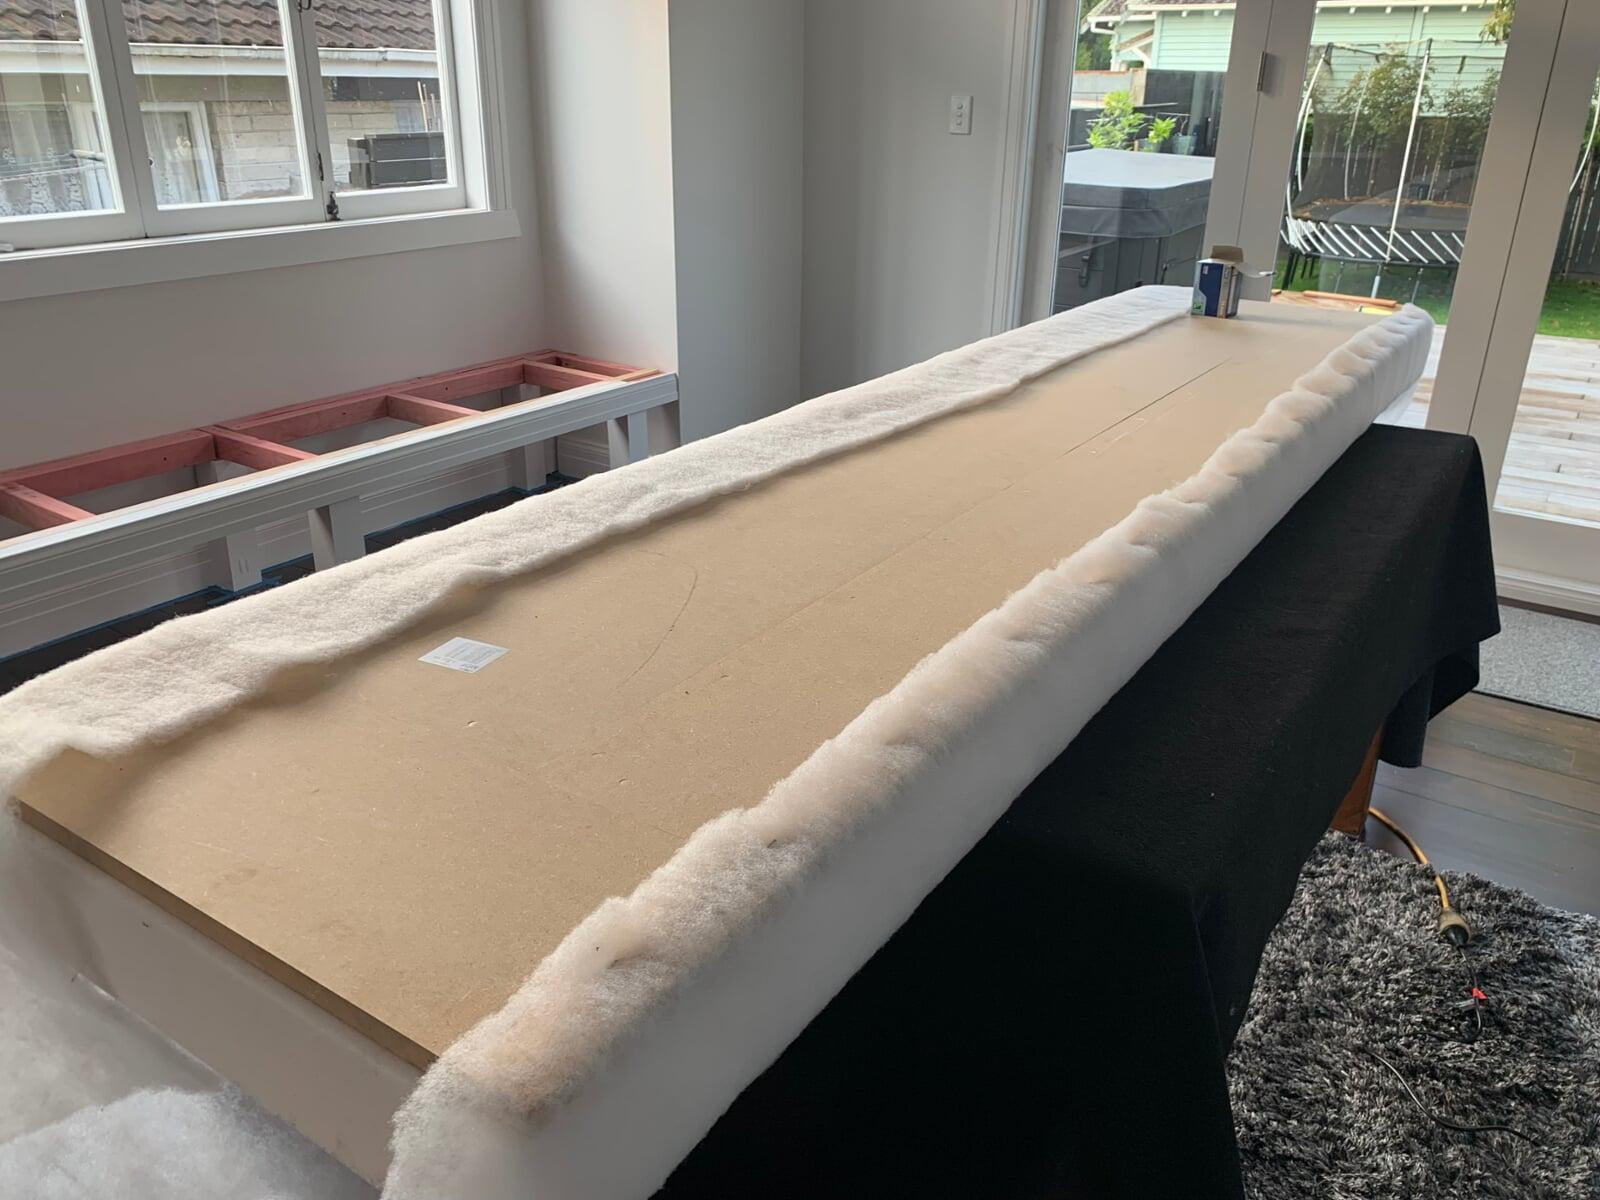
3. Next the fabric was Ironed, laid out (face down), batting layer on top, then foam and plywood laid face down. We allowed a generous margin at each side for folding.
4. Starting with the batting layer first we followed these steps to secure and repeated with the fabric.
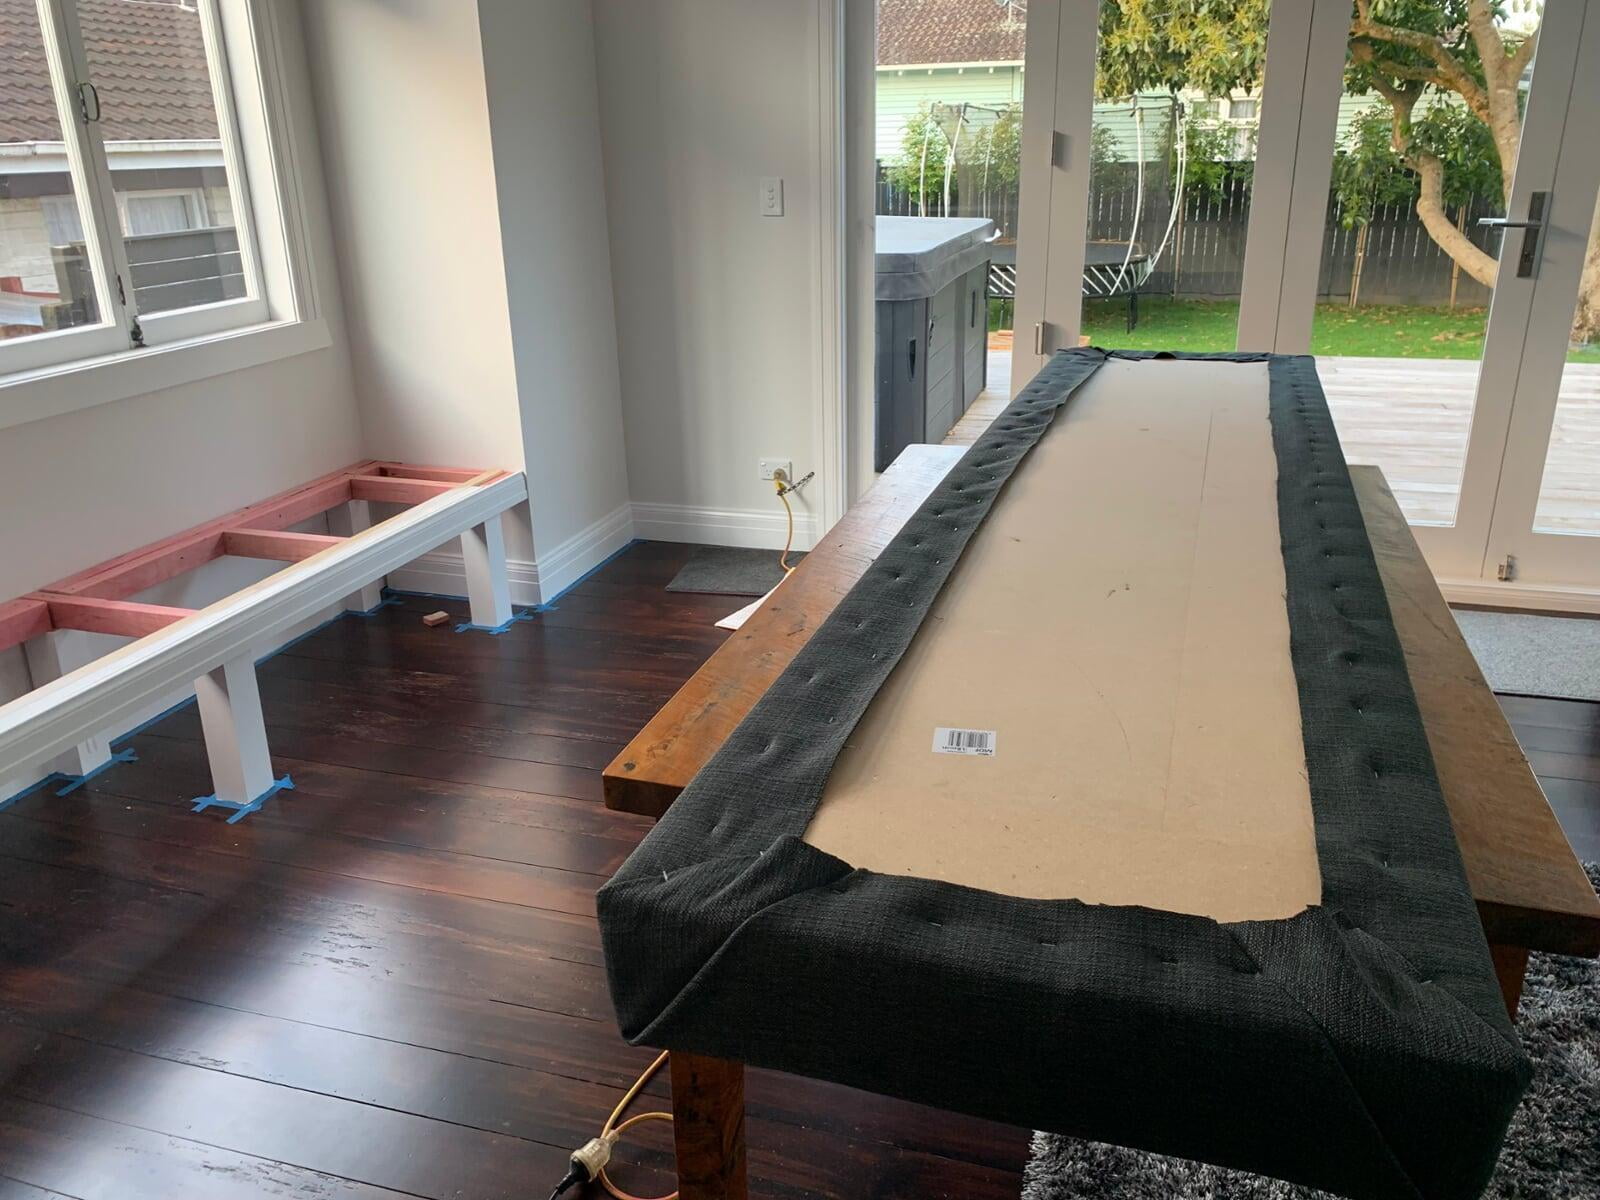
- Fold the edge over the foam and ply, keeping the fabric looking neat and straight. We brought up one side and stapled it into place using heavy duty staple gun (we got this one from Bunnings and it did the trick).
- Then did the opposite side pulling the fabric taut, (but not so tightly that the edges of the foam became rounded) until both lengths were secure. Tip: Lightly sand the sharp corners of the plywood or MDF board so when you pull the fabric over it, you have less chance of making a hole.
- There are a few options when it comes to the short edges and folding the corners; we used a similar process to wrapping a present: Bringing the fabric up on the diagonals to make a corner fold. They were held this in place while tucking the excess fabric snug against the width of the foam and board. With the first corner fold stapled into place, we then brought up the triangle of fabric and made a second diagonal corner fold.
- Continuing to pull the fabric taut, we repeated this process for the opposite corner. Working together made it easier to keep constant tension on the fabric. We finished the stapling and tweaked the fabric here and there.
The moment of truth
I’ll admit that we were still a little nervous flipping it over, hoping for a smooth, wrinkle-free surface… but phew, because we took our time we ended up with a perfect result.
Next we held our breath for the real moment of truth as we slotted the upholstered seat cushion into place. I will admit it was ‘snug’. Luckily we had allowed 5mm (give or take) for fabric with our measurements so it was perfect!
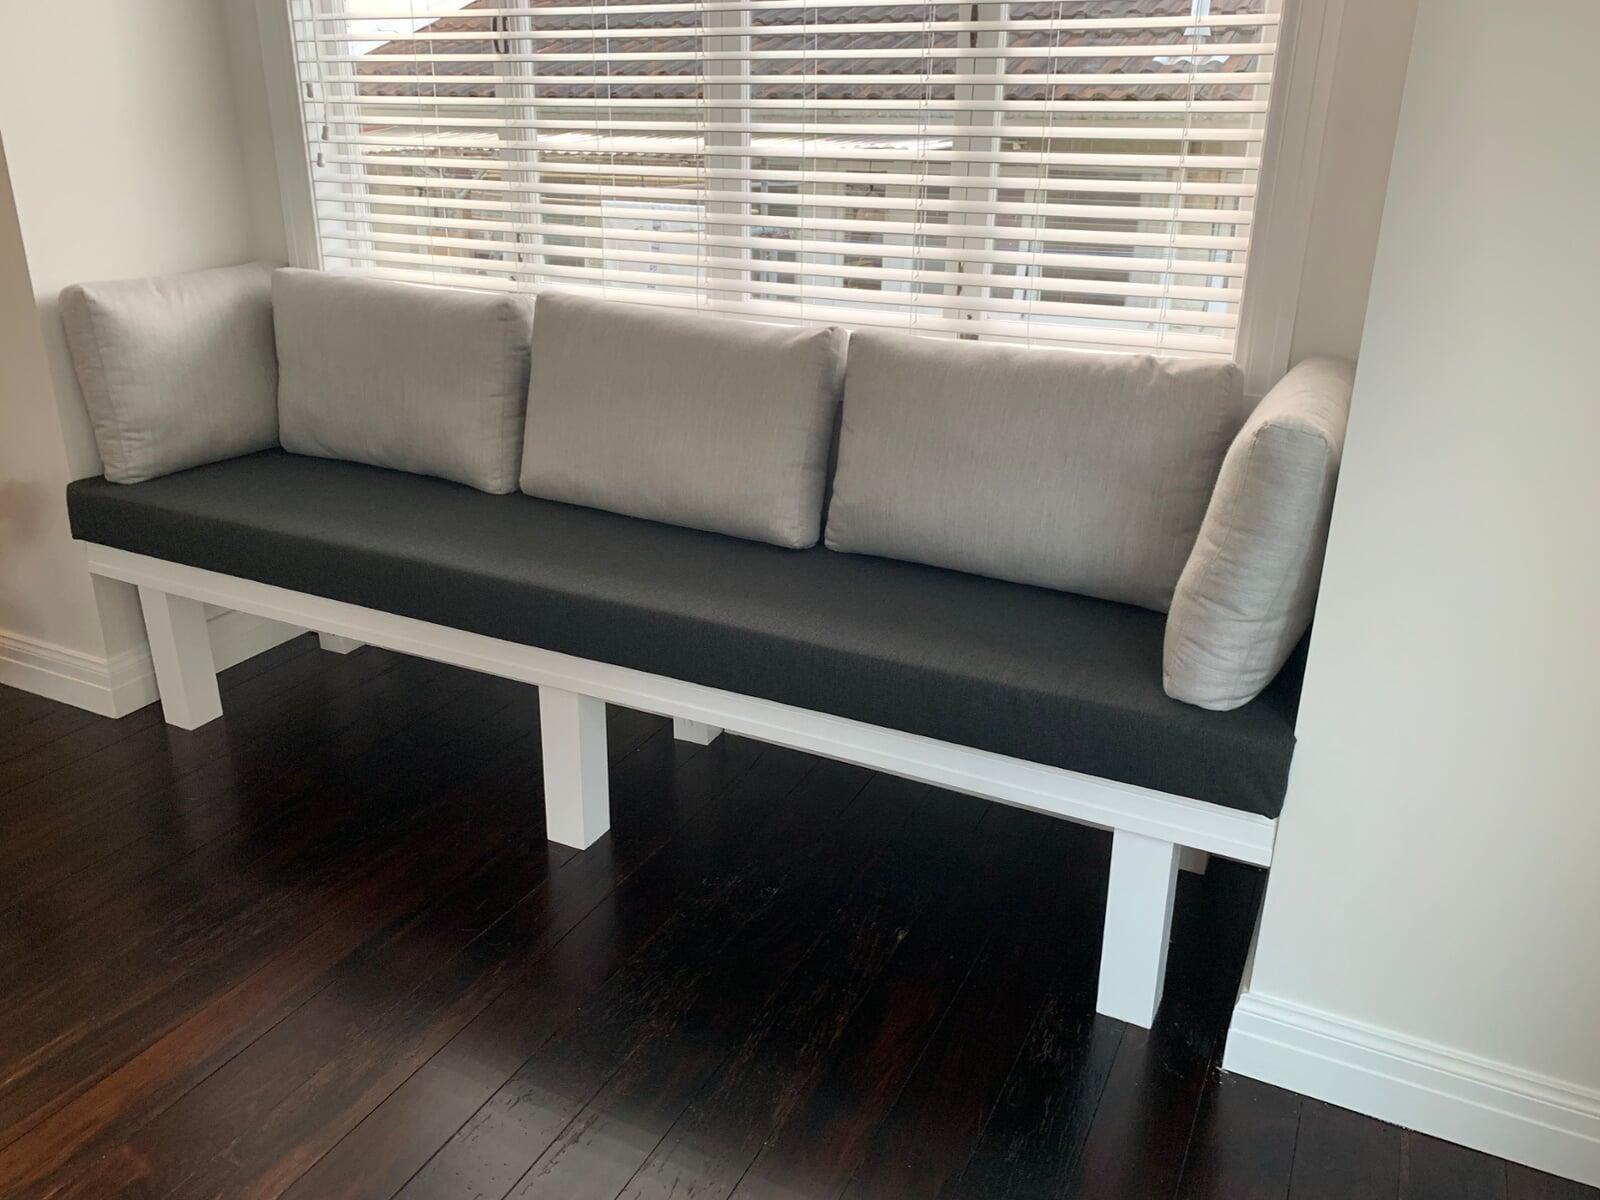
With the cushion fitting nicely against the walls, the corner folds were invisible.We added cushions to complete the look and add to the plush comfort level.
Having this window seat has transformed this area into a dining / relaxing / work friendly nook. It’s now inviting, multipurpose and a genuinely happy space where the kids love to curl up as much as we do. There’s no doubt that the window-seat is by far the best place to sit at at meal times now!
* This is not a sponsored blog, all materials and tools were chosen and paid for by the author. And are not representative of any relationships with the Home Show. Dale and Eve are purely enthusiastic DIY’ers so all instruction and tips are opinion only. Good luck with your own projects - we'd love to see you share them on our FaceBook page.